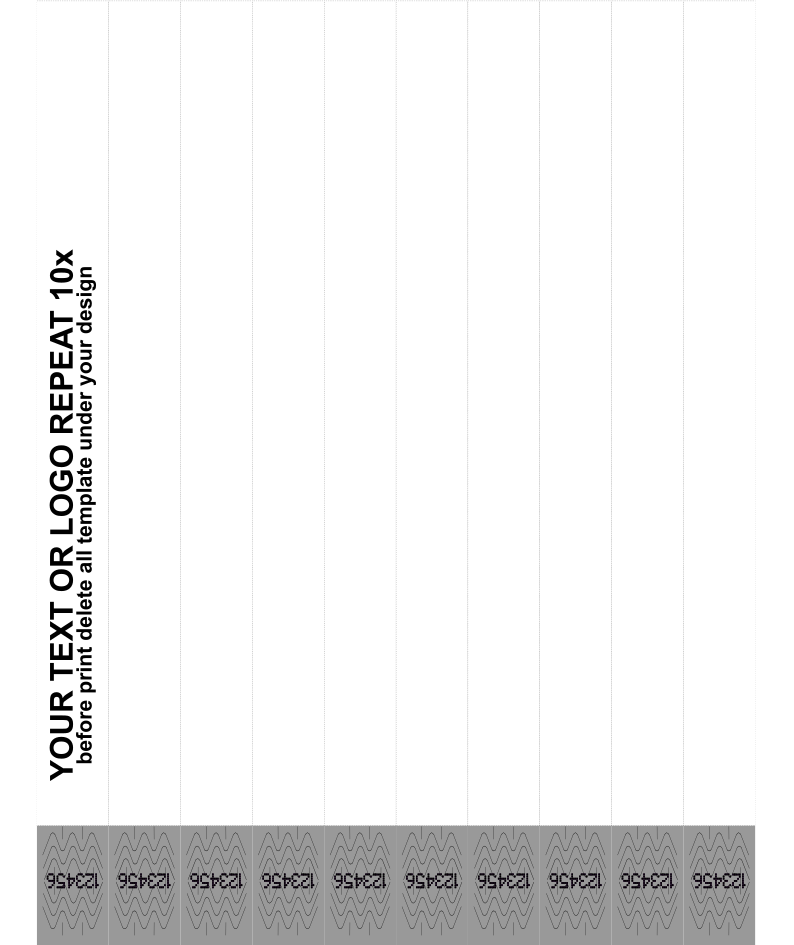



The print template for Glossy laser printable wristbands
new wristbands version, since 2026
This is a help sheet, not a specification. The template and the settings below are what works for us and for most people. The template is a starting point to save you the setup work, nothing more.
Every laser printer is different. Feed path, margins, fuser temperature and driver options all vary between models, and we have no way of knowing yours. We can’t promise the file will print perfectly first time on your machine, and we don’t take responsibility for the result. Expect to run a test sheet or two and adjust to your own hardware.
Glossy only. The matte wristbands (L300) use a different sheet and need their own template. Don’t reuse these numbers for matte.
What the template is
The template is a ready-made layout file holding ten wristbands in the exact positions they print in. You drop your design into it, print the sheet, and the bands come out aligned and ready to separate.
It comes in three formats: .ai, .cdr and .svg.
| Sheet size | 210 mm wide × 250 mm tall, portrait. The file is named 250x210mm; see the diagram under Printer settings for which measurement is which edge. |
| Bands per sheet | 10 |
| Band | 250 × 19 mm |
| Sheet weight | 8 g per sheet, around 150 g/m² — heavier than paper, but still a thin material |
| Design area per band | max 219 × 19 mm |
The sheet is portrait: 210 mm wide, 250 mm tall. The ten bands run from top to bottom, side by side like stripes. A band is 250 mm long, so it stands upright on the page and your design is rotated 90°. That is correct — the material is cut this way.
Download the template
All four files hold the same layout. Take the one your software opens and ignore the rest.
| Adobe Illustrator.ai · 280 kB | Illustrator, and anything that opens .ai files. |
| CorelDRAW v24.cdr · 609 kB | Saved in version 24, the newer format. Try this one first. |
| CorelDRAW v18.cdr · 609 kB | Saved in version 18, for older CorelDRAW that can’t open v24. |
| SVG.svg · 1.6 MB | Inkscape, Affinity, Figma and most other vector editors. |
Open the file and check that the page is 210 mm wide and 250 mm tall before you start. If your software offers to rescale or convert the document on opening, decline: the positions only work at the original size.
Do not change the sheet size or move the band positions. They match the way the material is cut, and anything printed outside them lands on the wrong part of the band.
Putting your design in
There are two ways to work, and you can mix them.
You already have a finished design
Place it into the first band position and size it to fit within 219 × 19 mm. Keep it inside the outline rather than filling the outline exactly, so a millimetre of feed drift doesn’t cost you an edge.
You want to build it in the template
Add your logo, text, barcode or QR code straight into the band position and arrange it there. The outline shows you exactly how much room you have.
Then copy the finished band to all ten positions. The whole sheet prints in one pass, so every position needs artwork on it, otherwise those bands come out blank. If you want a mixed sheet, for example five of one design and five of another, simply place different artwork in different positions.
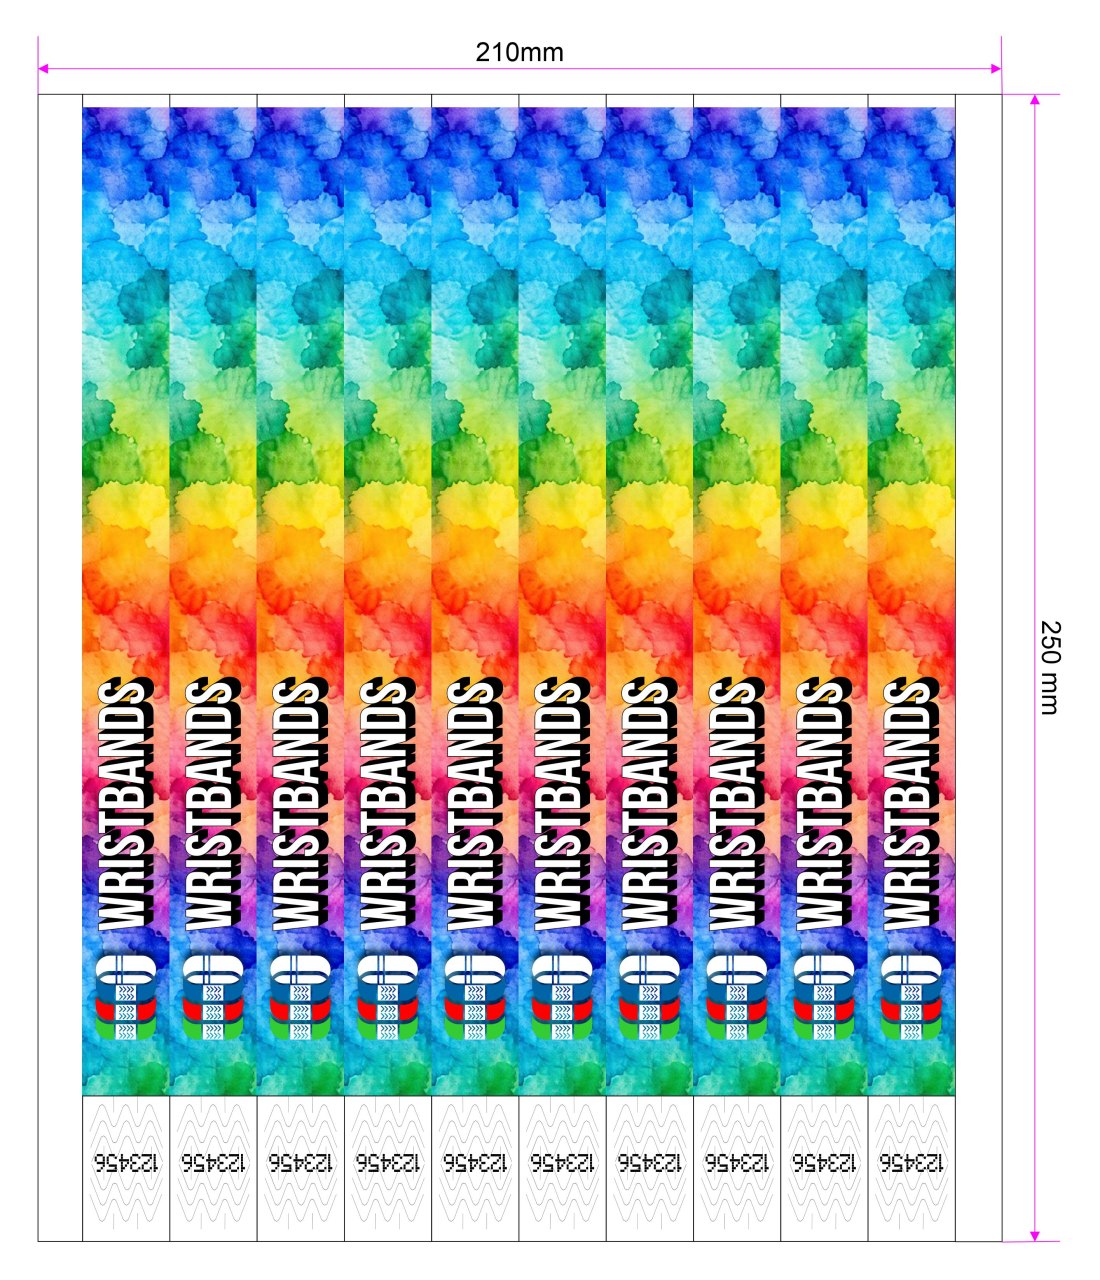
⚠️ Before you print: remove the template itself
This is the step people forget. The band outlines and guide marks exist only to position your artwork. They must not be printed.
Delete the entire template layer, or the background with the outlines, so that only your own artwork is left on the page. The page size stays 210 × 250 mm; only the guides go.
It is one click. The whole template is a single group, so select any part of it and delete: the outlines, the guides and the serial number boxes all go together. You don’t have to pick them off one by one.
If you print with the outlines still on, every single band carries a printed rectangle around the design, and the sheet is wasted.
Print one test sheet before running the full batch. It takes a minute and catches both this and any alignment problem.
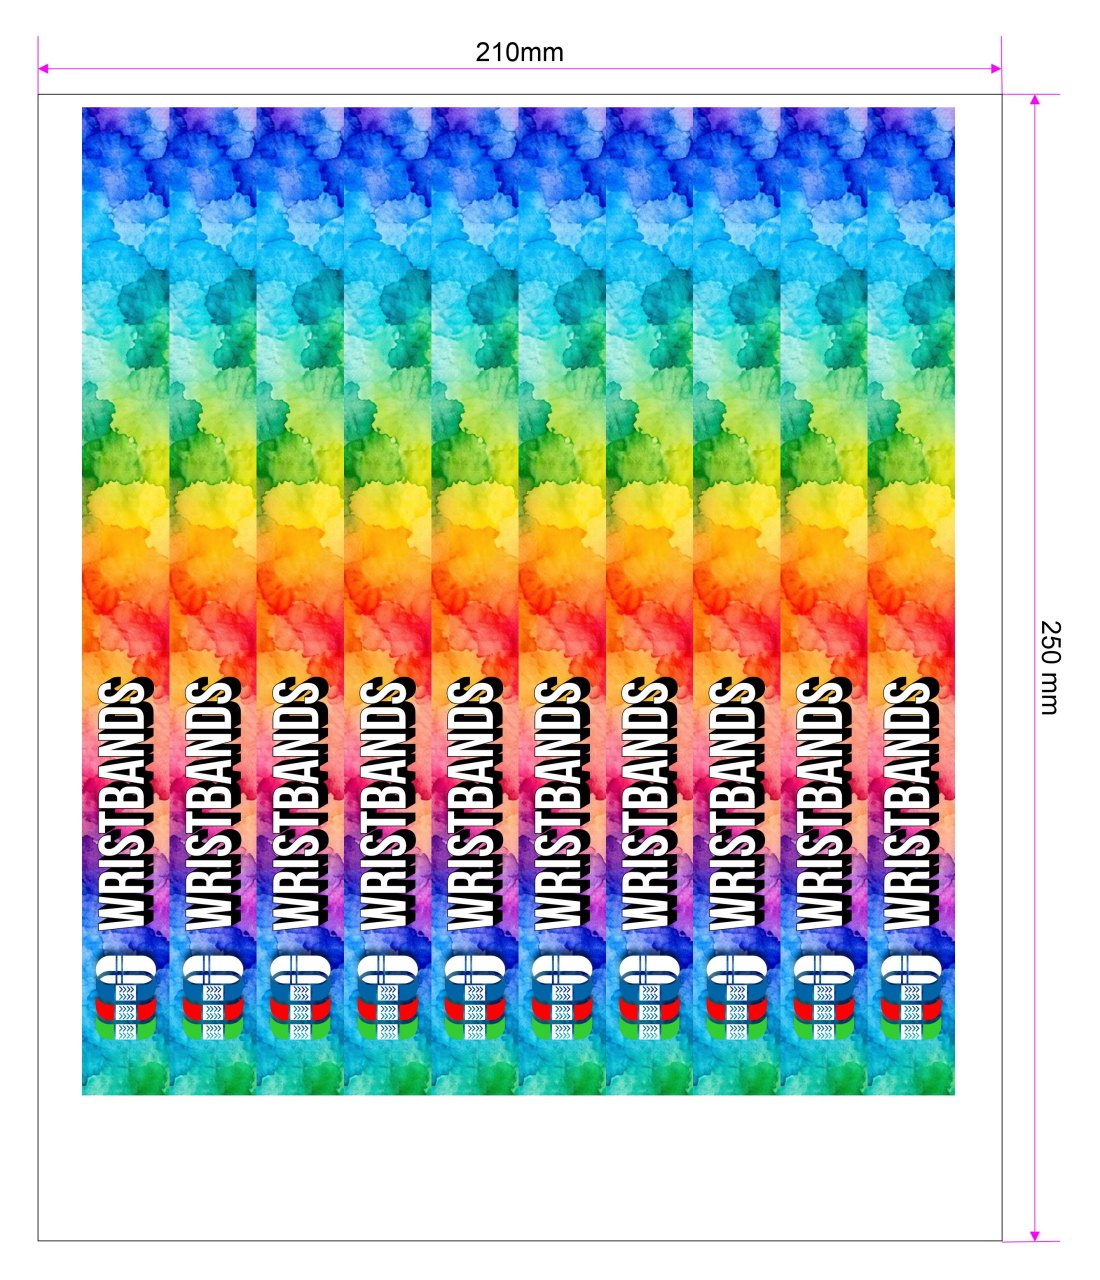
Printer settings
| Paper size | Custom, 210 × 250 mm. Create it in the printer driver if it isn’t there already. Drivers ask for this in different ways, so use the diagram below to see which measurement belongs to which edge. |
| Media type | Set it to around 100 g/m², or one step above plain paper. The sheets actually weigh about 150 g/m², but that is because the material is plastic, not because it is thick. In the printer they behave like a light, thin stock, so choosing 150 g/m² or cardstock makes the machine over-compensate. If your driver only offers names rather than numbers, high quality is the right neighbourhood. |
| Orientation | Portrait |
| Scaling | 100%. Turn off fit to page, shrink to fit and any auto-scaling. |
| Rotation | Depends on your printer. Feed direction varies between models, so check the first sheet and rotate the layout if the bands come out the wrong way round. |
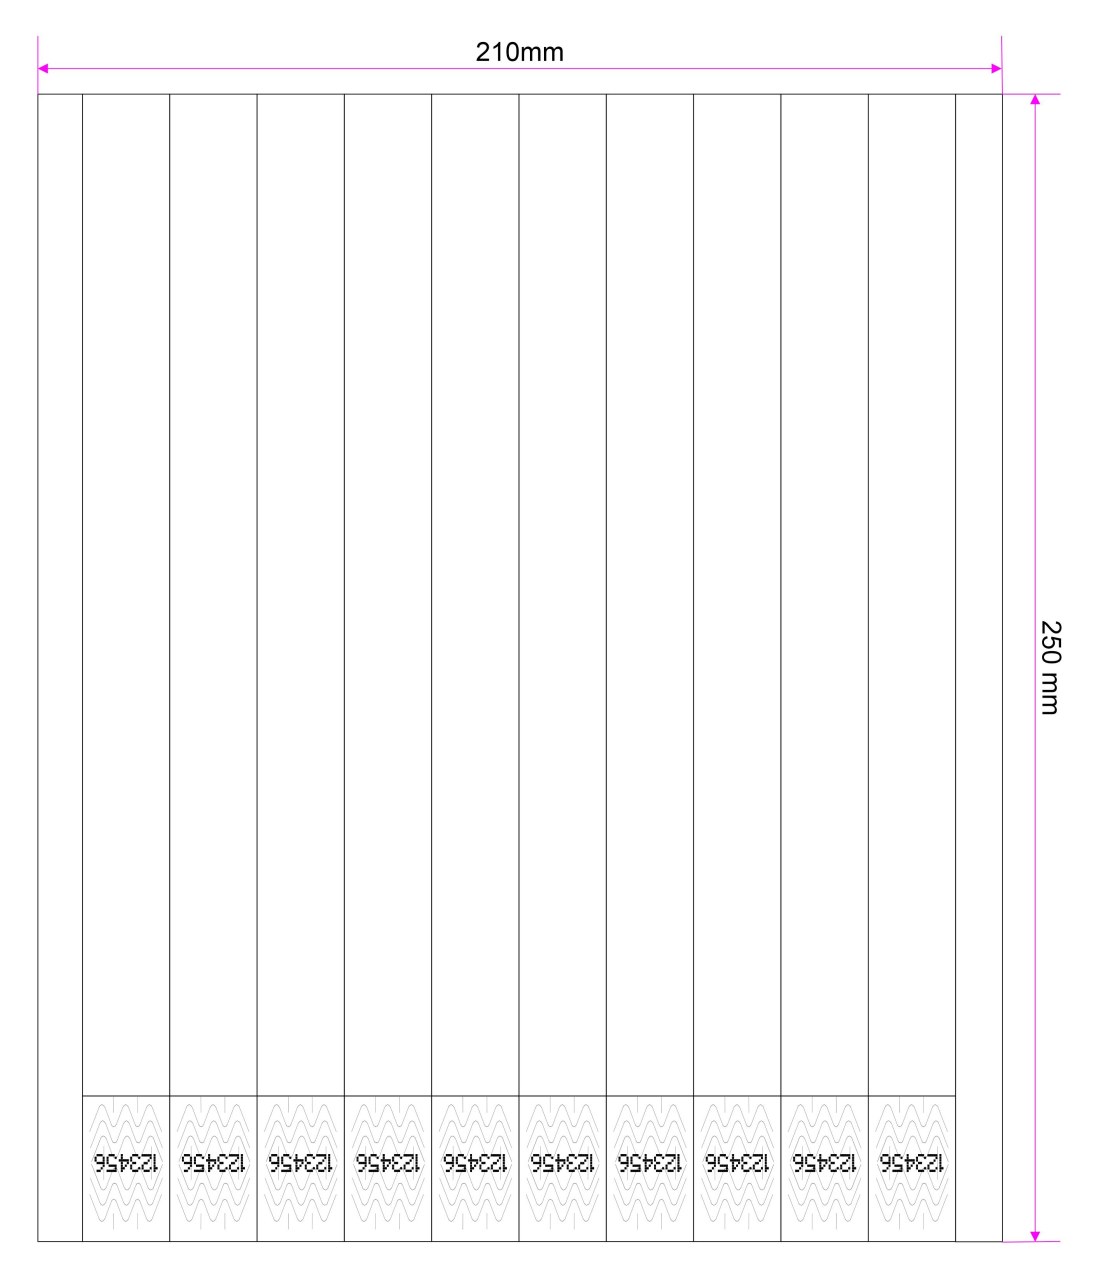
Loading the sheets
- Feed the edge without the adhesive first. One short edge of the sheet carries the sticky part of the bands. That edge must not be the leading edge going into the printer.
- Face up or face down depends on your printer. Some trays take paper printed-side up, others down, and the driver may define it either way. If you aren’t sure, run a single sheet and look at which side it printed on.
- Use the manual feed or multipurpose tray if your printer has one. It gives the straightest paper path, which matters for a material this thick.
If something comes out wrong
| Outlines printed around each band | The template layer wasn’t deleted. |
| Design sits off the band, or is cut at one edge | Scaling was left on, or the custom paper size wasn’t used. |
| Bands rotated 180°, or printed on the wrong side | Feed rotation: rotate the layout and run one more test sheet. |
| Toner rubs off | Media type still set to plain paper: move one step up, to a high-quality setting. |
Need more wristbands? The glossy laser-printable bands this template is made for:
Laser printable wristbands, glossy